Station Based
This workflow begins with selecting seismic stations and then finding events recorded by those stations.
Overview
The Station Based workflow focuses on analyses that start with specific seismic stations of interest. This approach organizes workflows around particular monitoring points, allowing you to study all events recorded at those stations.
Workflow Steps
Select Stations: Choose seismic stations based on criteria such as network, location, or operational parameters
Select Events: Navigate to the events page to find earthquake events recorded by the selected stations
Download Waveforms: Go to the waveform page to download data for the selected station-event pairs
This workflow is particularly useful for:
Station-specific studies and calibration
Regional network analysis
Long-term station performance evaluation
Comparing event recordings at specific stations of interest
Step 1: Search & Select Stations
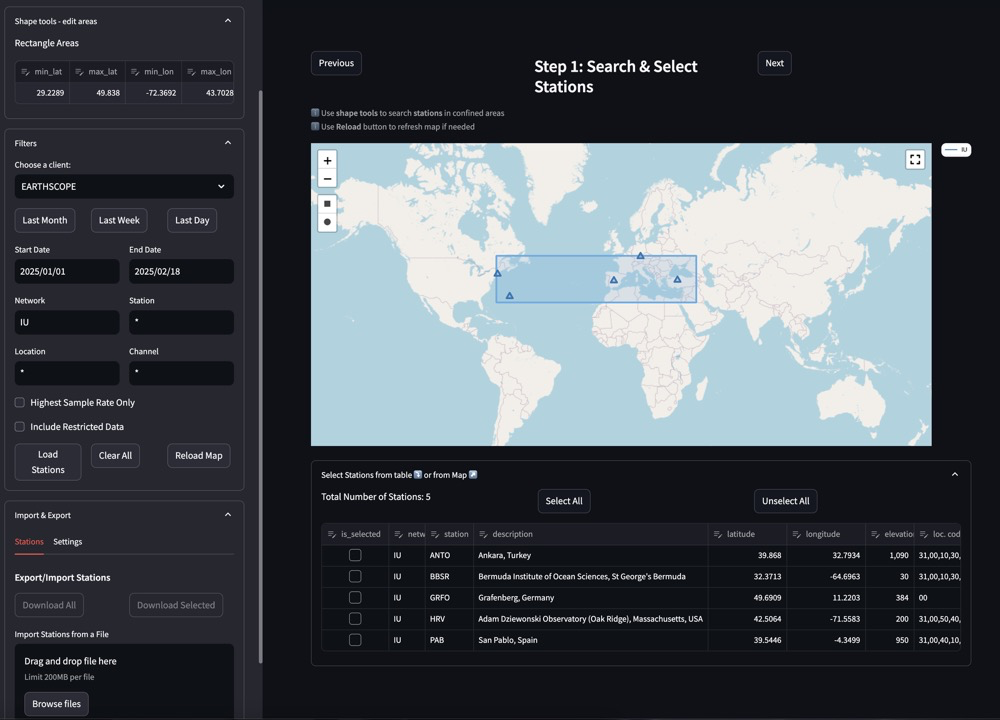
Station selection interface showing map and filtering options
The station selection interface allows you to search for and select seismic stations using various criteria:
- Filtering Options:
FDSN Client: Select a data provider (e.g., EARTHSCOPE)
After selecting your stations, click the “Next” button to proceed to the next step in the workflow.
Step 2: Select Events
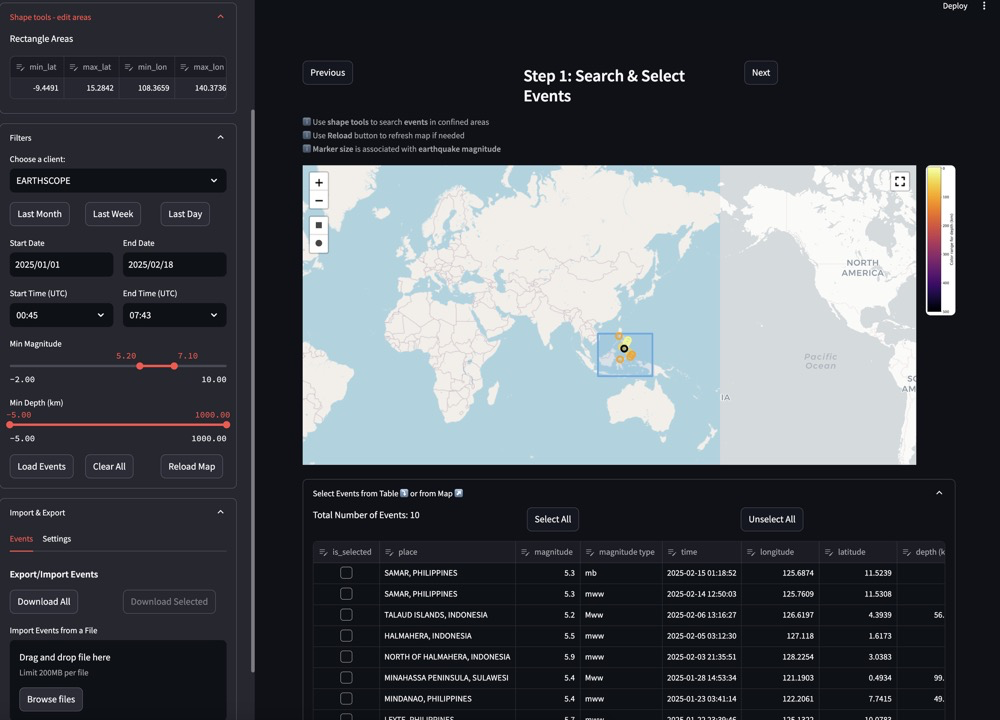
After selecting seismic stations, the next step is to choose earthquake events that were recorded by these stations.
The event selection interface for the station-based workflow is similar to the one in the events-based workflow, but with an important difference: the events shown are filtered to only include those that were recorded by the stations you selected in Step 1.
- Event Filtering Options:
FDSN Client: Select a data provider (e.g., EARTHSCOPE)
Time Range: Set a specific date range or use quick options (Last Month, Last Week, Last Day)
Time (UTC): Specify start and end times within the selected dates
Magnitude Range: Use the slider to set minimum and maximum magnitude values
Depth Range (km): Use the slider to set minimum and maximum depth values
- Event Selection:
View events in the table that were recorded by your selected stations
Select individual events using checkboxes
Use “Select All” or “Unselect All” buttons to quickly manage selections
Event details shown include location, magnitude, magnitude type, time, coordinates, and depth
After selecting your events, click the “Next” button to proceed to the final step in the workflow.
Step 3: Download & Analyze Waveforms
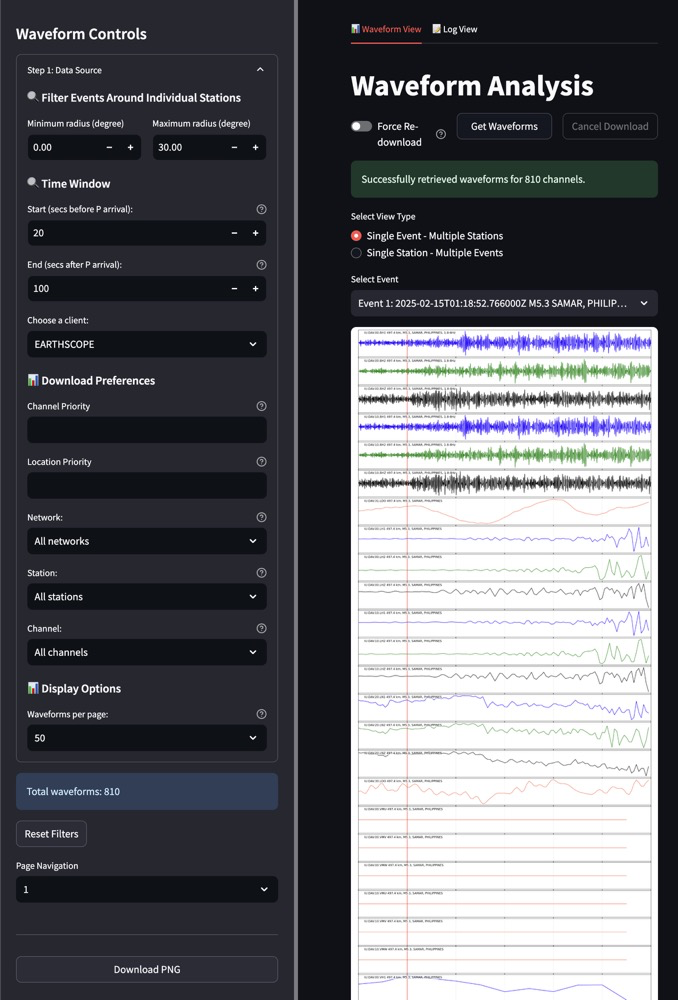
Waveform download and analysis interface showing controls and visualization
The waveform download and analysis interface allows you to retrieve, view, and analyze seismic waveform data for your selected stations and events:
- Waveform Analysis:
Toggle between Waveform View and Log View
Use “Get Waveforms” button to retrieve data
“Force Re-download” option to bypass cache
View success messages (e.g., “Successfully retrieved waveforms for 810 channels”)
Select view type: * Single Event - Multiple Stations (shown in screenshot) * Single Station - Multiple Events (particularly useful for station-based analysis)
Select specific events from dropdown menu
View waveform visualizations with color-coded channels
Download visualizations as PNG images
- Navigation:
Page through multiple waveforms using the page navigation controls
Reset filters to start a new search
View total number of waveforms retrieved
This step completes the Station Based workflow, providing you with the waveform data needed for your analysis.
Key Features
Station-centric data organization
Station metadata browsing and filtering
Event filtering based on station coverage
Comprehensive station information display
Multi-station data comparison capabilities