Events Based
This workflow begins with selecting earthquake events and then finding stations that recorded those events.
Overview
The Events Based workflow is designed for analyses that start with specific earthquake events of interest. This approach is ideal for studying particular earthquakes and their recordings across multiple stations.
Workflow Steps
Select Events: Choose earthquake events based on criteria such as time range, magnitude, and geographic location
Select Stations: Choose seismic stations that recorded the selected events
Download Waveforms: Retrieve waveform data for the selected event-station pairs
Step 1: Search & Select Events
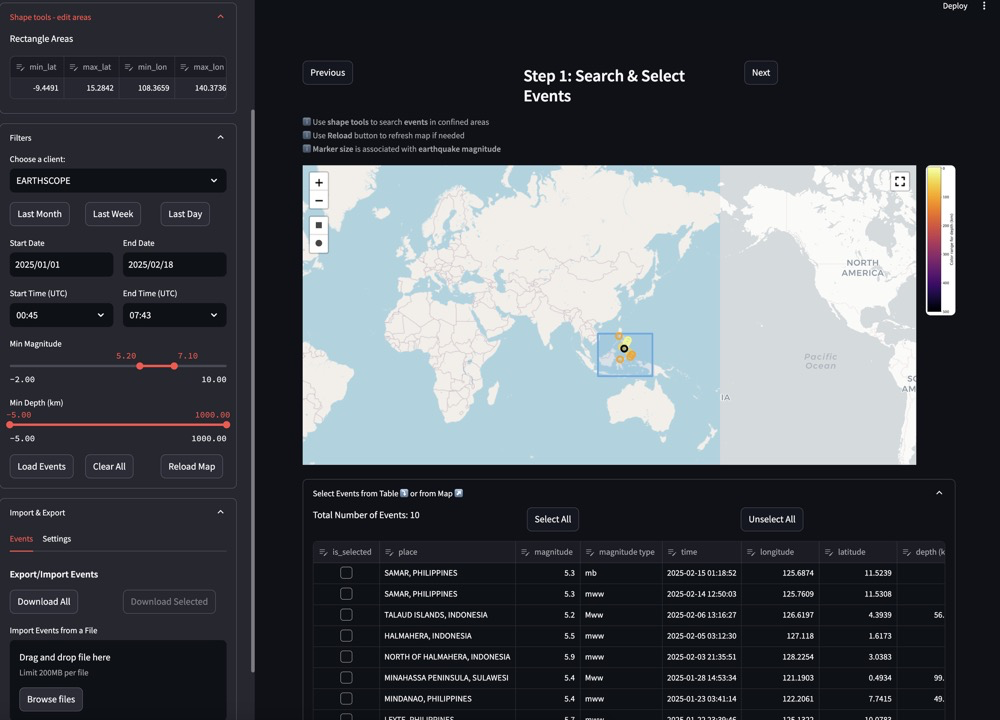
Event selection interface showing map and filtering options
The event selection interface allows you to search for and select earthquake events using various criteria:
- Filtering Options:
FDSN Client: Select a data provider (e.g., EARTHSCOPE)
After selecting your events, click the “Next” button to proceed to the next step in the workflow.
Step 2: Select Stations
After selecting earthquake events, the next step is to choose seismic stations that recorded these events.
The station selection interface for the events-based workflow is similar to the one in the station-based workflow, but with an important difference: the stations shown are filtered to only include those that have recorded the events you selected in Step 1.
- Station Filtering Options:
FDSN Client: Select a data provider (e.g., EARTHSCOPE)
Network: Filter by seismic network code
Station: Filter by specific station codes
Location: Filter by location codes
Channel: Filter by channel codes
Additional Options: * Toggle “Highest Sample Rate Only” to limit results * Include restricted data if you have appropriate credentials
- Station Selection:
View stations in the table that have recorded your selected events
Select individual stations using checkboxes
Use “Select All” or “Unselect All” buttons to quickly manage selections
Station details shown include network, station code, description, coordinates, and elevation
After selecting your stations, click the “Next” button to proceed to the final step in the workflow.
Step 3: Download & Analyze Waveforms
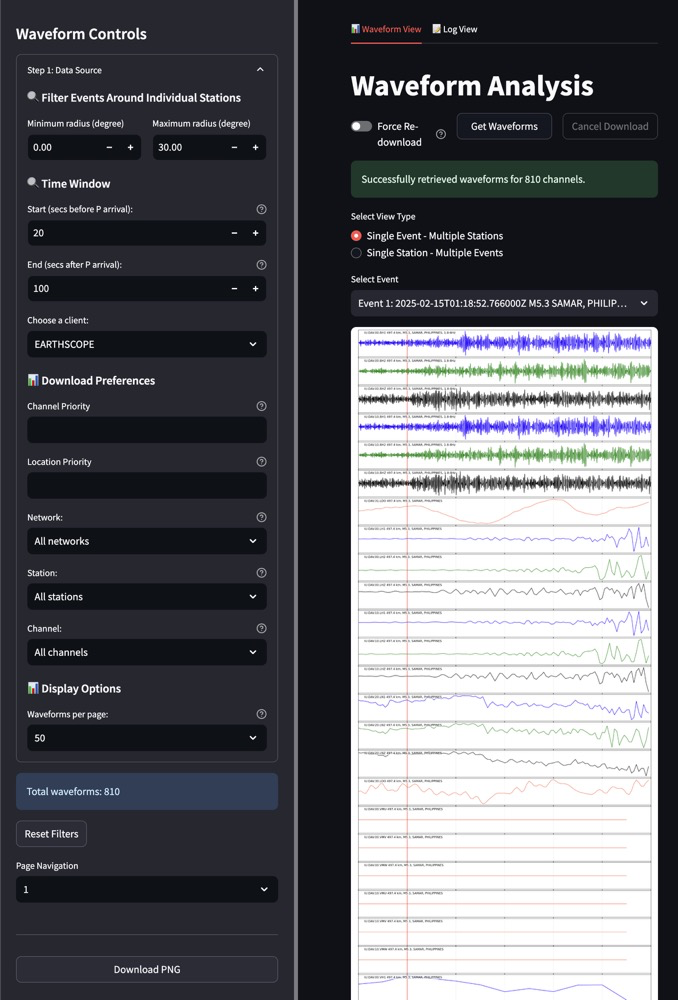
Waveform download and analysis interface showing controls and visualization
The waveform download and analysis interface allows you to retrieve, view, and analyze seismic waveform data for your selected events and stations:
- Waveform Analysis:
Toggle between Waveform View and Log View
Use “Get Waveforms” button to retrieve data
“Force Re-download” option to bypass cache
View success messages (e.g., “Successfully retrieved waveforms for 810 channels”)
Select view type: * Single Event - Multiple Stations (shown in screenshot) * Single Station - Multiple Events
Select specific events from dropdown menu
View waveform visualizations with color-coded channels
Download visualizations as PNG images
- Navigation:
Page through multiple waveforms using the page navigation controls
Reset filters to start a new search
View total number of waveforms retrieved
This step completes the Events Based workflow, providing you with the waveform data needed for your analysis.
This workflow is particularly useful for:
Studying specific earthquakes of interest
Analyzing how a particular event was recorded at different stations
Creating event-centered datasets for research
Key Features
Event-driven processing architecture
Configurable event selection criteria
Station filtering based on event coverage
Batch waveform downloading for multiple event-station pairs
Event metadata visualization and export